:quality(50))
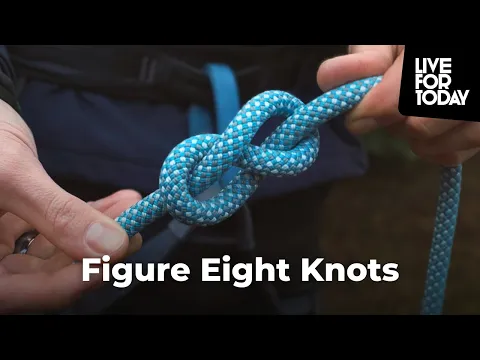
How To Tie A Figure Eight Knot The - Easy Way
Learn how to tie the figure eight knot with our step-by-step guide from measuring the rope to tying a secure knot, ensuring your safety on every climb & abseil.
Climbing is an adventure that demands skill, courage, and, importantly, knowledge of essential knots.
Among these, the figure eight knot is the cornerstone for securely tying oneself to a harness, ensuring safety as you ascend and descend.
This knot is fundamental for climbers and a skill that, once mastered, provides confidence and security in every climb.
The Importance of Safety
Before embarking on this guide, it's crucial to underscore the importance of safety in climbing.
Knots are the lifelines that keep climbers secure, making seeking proper instruction and training essential.
This guide is a starting point, but hands-on learning with an instructor is invaluable for beginners.
Step-by-Step Guide to Tying the Figure Eight Knot
1. Measuring the Rope
The first step involves measuring out the correct length of the rope.
The measuring point varies from person to person, but a general guide is to extend the rope to about shoulder length.
It's a process of trial and error to find the perfect length that ensures the knot is neither too loose (risking undoing) nor leaves excessive trailing rope that could interfere with your climb.
2. Tying the Knot
Once you've measured your rope, hold onto that spot tightly. Then, execute three half turns with the rope and pull the end through, forming a figure of eight.
Be cautious to complete all three half turns; missing a turn could result in an incorrect and unsafe knot.
3. Attaching to the Harness
With your figure of eight knot ready, it's time to attach it to your harness.
The knot should be fed through your harness's waist and leg loops, avoiding the belay loop.
This method ensures that the other loop will keep you secure in the unlikely event of one of the loops failing.
Additionally, feeding the rope through both loops provides more comfort during prolonged hangs.
Note: We recommend threading the rope into your harness from top to bottom. So waist loop first, then leg loop. That way if you miss one you’ll still be tied in to your waist. Remember to always double check your knot before climbing.
4. Securing the Knot
After threading the rope through your harness, retrace your steps to tighten the figure eight knot.
Ensure the tail end of the rope runs parallel to the initial knot, then trace back along the original route, pulling each section tight.
A correctly tied knot will have five sets of parallel lines without any crossover.
5. Adding a Stopper Knot
Finally, tie a stopper knot at the end of your rope for added safety.
This extra measure is often a requirement in climbing gyms and serves as an additional safeguard against the knot loosening.
Final Checks and Practice
Before you start climbing, thoroughly check your knot, verifying that the five parallel lines and the stopper knot are all correctly in place.
It's also wise to check your climbing partner's knot, ensuring everyone's safety before the climb begins.
Mastering the figure eight knot is a rite of passage for climbers.
With practice, this knot will become second nature, a foundation of your climbing adventures.
Join The Adventure Almanac
Get our latest stories, competitions, events & offers, straight to your inbox.